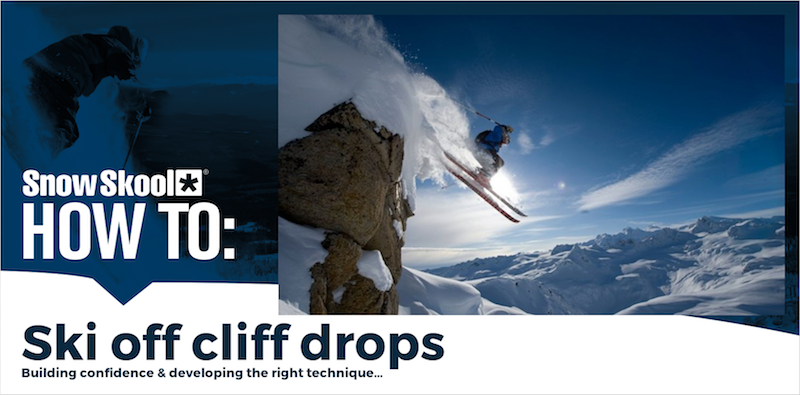
For some, skiing on piste is just not exciting enough. When the snow falls deep and the powder days approach, the need to divert from the beaten path becomes even stronger. A ski movie or GoPro video can often be the spark...or just seeing some dude ski a soft pillow line and then dropping a small cliff and making it look so effortless.
Is this something that you are longing to do, or to start doing, but you're concerned about not quite being able to ‘stomp’ the landing?
Well, here are SnowSkool’s tips to landing your first cliff drop and to progressing to larger drops.
But first a cautionary note: when venturing off-piste in search of deep powder and that perfect drop, make sure that you are fully aware of all the backcountry safety and precautions/ preparations that you should be taking/ making. For some starter information check out the SnowSkool backcountry blog from winter.
1. Select the right drop
If this is your first drop, start small. Like anything new, especially with higher risk activities, you need to work up to each stage.
Look for something smaller than your own height to begin with, this may seem far too easy and boring to some but building confidence and developing the right technique will set you up to progress further so you can eventually safely take on the bigger drops.
So to begin with look for a small drop on a slope with a low gradient. This will allow you to control your speed and focus on the execution.
Once you feel comfortable on a small drop on low gradient terrain, look for a similar drop size on steeper terrain. You can then work at hitting that drop faster - getting more air at the same time. Then once you’re feeling comfortable you can move to a larger drop, go through the same process, then keep moving up from there until you can confidently (and competently) take on big drops.
2. Mark your take off spot
Make sure you also mark your take off: either by a rock, some visible grass - or you can mark the spot with your pole before you go. This will help you to take off at the spot that you’ve measured and chosen beforehand. If there are trees, rocks or other obstacles that you could hit if you land in the wrong place then this is even more important.
I usually look for some sort of visible marker at the the edge (or a marker in the distance) to make sure I am taking off from the correct point and at the correct angle.
You need to make sure you take off and land where you want - but also that you land in the fall line. If you attempt to land across the slope then you will almost certainly be the key part of a very dramatic crash as your momentum carries you sideways and down the mountain.
Another thing to think about is your immediate surroundings when you land, are there large rocks, are there trees, what’s the snow like? Fully take in your environment before you drop so you know what you’re dealing with once you land - you don’t want to make an epic jump to then to ski into a tree two seconds later!
And a final thing to check is the depth of the snow on the landing spot (see point 5).
3. Control your speed
This is an aspect that will differ depending on the size and shape of the drop. If the drop is near vertical, or the drop has a cornice, then a slower minimum speed will be required to drop.
If the cliff face is not vertical but continues down the slope, then you will have to take more speed into the drop to clear it all. In this case, you should feel confident before approaching as you do not want to drop without the right speed and land on rock, not snow!
4. For balance, Pop!
To pop means to jump, basically, and in this blog we are recommending a central pop. You should be central in your skis or board, and when you jump (bend your ankles, knees and hips and then explode upwards) everything must come off the ground at the same time.
Here’s an exercise to practice, away from a drop or jump:
Get flat on the snow, pop:
If the front of your skis only lift off the snow this means you are balanced too far back. If you pop and the front / tips of your skis stay on the snow but your tail lifts you are leaning too far forward. Everything should come off the ground at the same time.
It’s not always a bad thing if it doesn’t though, there are different ways to jump depending on your outcome and the feature you are trying to hit, especially in the park (Google a ‘nollie’ for example). But general speaking a central pop is better and more balanced when skiing off drops.
Popping puts you in control of your momentum. If you just roll off the edge, 1) you may not clear the drop, you may hit rock on the way down, and 2) you will most likely be off balance with your skis dropping beneath you.
This is pretty common: I have seen plenty of people that just sit back and let the lip of the jump or shape of the drop control their body position. Don’t let this happen but depending on your confidence, you can pop as big or small as you like.
You may also have heard of people ‘winding down the windows’, flapping their arms in the air. This is due to a lack of balance, which can be prevented with the correct take-off (pop) and body position through the air.
Once you are in the air keep your knees bent and body compact, this will help to control your balance in the air and also prepare you to extend your legs for landing.
5. Nail the landing
This is key, you’re almost there, don’t mess it up now (there may be cameras watching).
Stay composed and focus on your landing while you’re in the air. As your landing approaches bring your arms out so that you don’t get a ski pole handle to your face or body – and extend your legs slightly so that you are ready to absorb the landing impact.
If you have popped on the take-off, be balanced without flapping your arms around. You should be central, stable and prepared to land. Once your skis touch snow, drop your bottom down to counter the forward momentum and to avoid the otherwise inevitable forward roll.
Depending on how deep the snow is on the landing (you should check first) and what angle the gradient of the landing is, you will have to alter you position accordingly. Deep snow will mean that you should be further back when landing so that the fronts of your skis do not get buried in the snow – this will cause you to eject and rag doll down the snow. More compact and firmer snow (less powder) will mean that you should land more centrally on your skis and be ready to compress your body to absorb a potentially hard landing.
Then, hopefully, at this point you can now ski away with style, a fist pump and some great footage to brag about later.
Looking for motivation, check out the 2013 world record cliff drop
…Please work up to this!
6. Try a Ski or Snowboard Instructor Course
Another great way push your skiing ability to the next level and build up to drops and cornices, is by completing a ski instructor course. If skiing is a love of yours why not learn to instruct and spend 11 weeks out in the mountains, on what is effectively a fully catered skiing holiday! Completing a ski instructor course or snowboard instructor course can be one of the best ways to improve your technique and confidence when skiing or boarding, plus it’s an amazing experience to meet like-minded people who’ll become friends for life! SnowSkool runs ski/snowboard instructor courses in Canada, France and New Zealand.